Restoring a System 80 / Video Genie/ PMC-80 Part 3: A replacement case, keyboard, RF cable and a cassette toggle switch
 Introduction
This is part three of a restoration project which started with a non-working System 80 I had languishing around the garage as a source of spare parts. One day I managed to get it going by removing the 48k RAM expansion and ensuring the 8 RAM ICs (16k) left actually worked! I then fixed a video issue and repaired the cassette recorder. I now had a working machine.
It was time to go the whole hog and make this machine one someone would be proud to own. There were issues still that remained to be dealt with. One was the scruffy case. I also wanted to add the missing RF modulator cord which allowed the computer to be plugged into a TV aerial socket.
It turns out I did a lot more than just these tend to these two problems. Read on...
The existing case
The existing case had been through the school of hard knocks and it showed. There was only mild yellowing but some plastic was missing from the front upper edge and a large chunk was also missing at the back. However the worst fault was inside. Three of the long screw holders which should have been moulded into the top of the case had snapped off meaning that the case was only held together by four screws, three in the front and one in the left rear corner. This left the top and bottom of the right side (especially the right back) unsecured and put a lot of strain on the screws that remained when the case was moved.
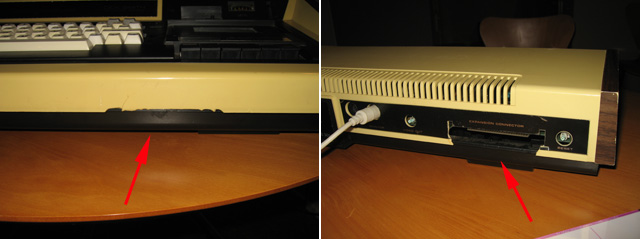
Figure 1. Damage to this original System 80 case
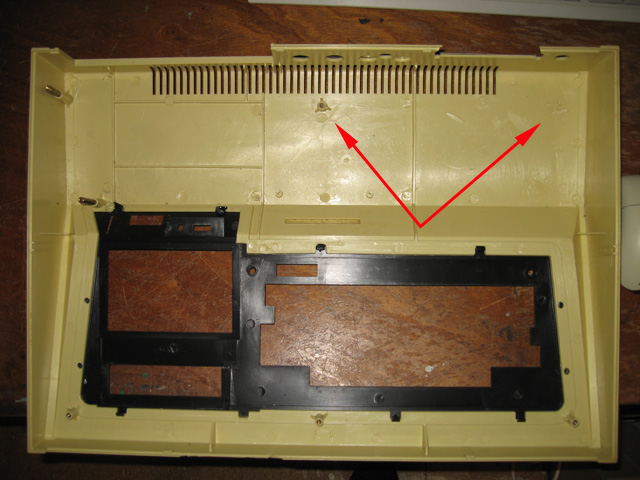
Figure 2. Missing (snapped-off) screw holders)
A replacement case - Not perfect but an improvement
As well as my two showcase System 80s and this one, I also had a forth unit sitting at the back of a dark corner in the garage. This one was missing a PSU which I'd thrown away (pity, as I probably could have fixed it now). I had removed the circuit boards and they resided in my parts bin. This forth unit's case had issues of it's own. There were several discoloured soldering iron "melt marks" on the lower front where someone had accidentally got too close with the tool. The case was as yellow as cheddar cheese. The keyboard (which was equally yellowed) had extra keys added. However in its favour the case had all its screw holders and there was no plastic missing. On balance therefore I deemed it better than the existing one.
Keycap swap
To accommodate these extra keys a slot had been cut out of the keyboard bezel. This had been neatly done, but it meant I couldn't simply swap the case over otherwise there would have been a gaping hole above the existing keys. I was also going to have to swap the keyboard too. However it didn't have to suffer the scourge of yellow. I simply swapped the golden keycaps on the replacement keyboard with the nice white keycaps of the original one. I couldn't replace the extra keys added of course but these were of a different shape and type so it didn't really matter from a visual perspective. I kept the yellow keys as spares, to be de-yellowed sometime in the future.
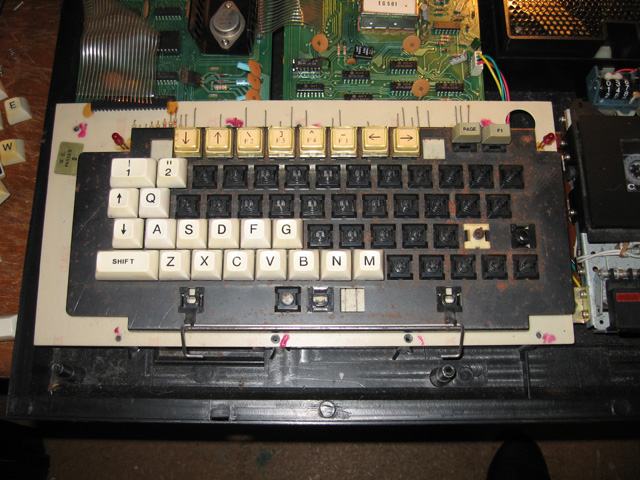
Figure 3. Replacing the yellowed key caps of the replacement keyboard with white ones from the original. Note extra keys at top
Retr0Bright
Then there was the case itself. A good dose of Retr0Bright and a few hours in the New Zealand sun saw the plastic return to a respectable cream colour. This really is a wonderful process.
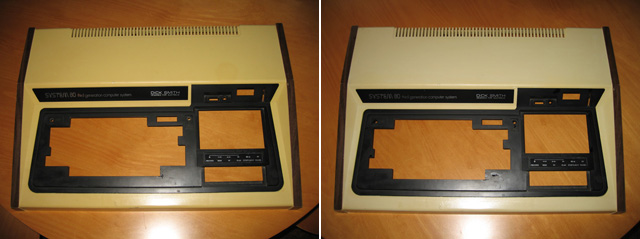
Figure 4. Retr0Brite on the replacement case. Untreated on left, treated on right
RF modulator cord and cord holders
Somewhere along the way this System 80 had lost its RF modulator cord. Back in the early 1980s it was uncommon for televisions to have composite input plugs, so many home computers came with a RF modulator built it. A cord would run from this straight to the TV aerial socket. The System 80s were sold with one of these cords attached, which wrapped around two holders at the back. However, most System 80 owners soon ditched the TV idea and bought dedicated monitors. Once this happened, the RF cord and holders actually became a nuisance and may owners dispensed with them. On this unit, not only was the cord missing but both the holders too.
Attaching a replacement cord was no problem. However, getting replacement cord holders proved difficult. I have one of the pair, which was attached to System 80 whose case I'm now using. At the time of writing I'm still seeking the second one. If you have a spare, let me know. I could do with the caps that go over the video cut and reset switches too!
Screen video fix (re-visited)
While I had the machine open I decided my original jumper repair for the screen flicker issue looked untidy. I decided the bridge for the cut track would look much better on the bottom of the circuit board rather than looking like a hack on the top. Yes, I know, I'm fussy about these things. Anyway, I made it so.
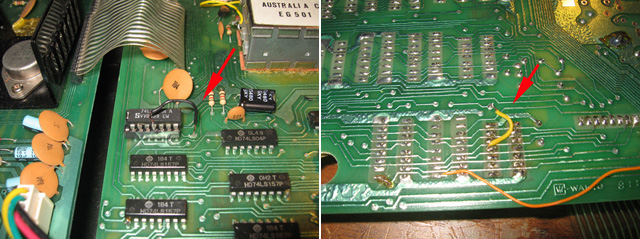
Figure 5. Original fix (left), revised fix on bottom of board (right)
Adding a cassette toggle switch
The replacement case had two small neat holes drilled in the top back of the case. Given that the System 80 inbuilt cassette decks were never that reliable and there was a switch hole there anyway, I decided to re-mod the cassette port swap modification the way it should have been done originally. This meant wiring up a small toggle switch mounted in one of these holes, which when thrown made cassette #1 cassette #2 and vice versa. It gave any potential user more flexibility with cassette usage (and filled in one of the holes!). The other hole probably originally housed a switch for the sound modification.

Figure 6. Added cassette switch and RF cord
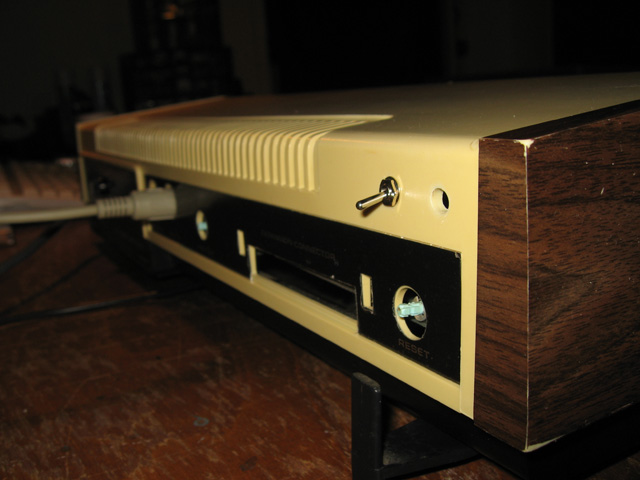
Figure 7. Back of replacement case showing cassette toggle switch
Progress so far
In the end I removed the RF cable as, without the right-hand holder, it made the unit untidy looking and difficult to manage. Besides, all modern TVs have an AV input these days.
That notwithstanding I am pretty happy with my refurbishment effort to date.
Pity I couldn't find a second RF cable holder or the caps for the back push-switches but that's the problem with old gear. Those little things get lost or tossed. Of course even if it had those, this 16k machine isn't in the same configuration Dick Smith would have sold it to you in 1982. There are extra keys, a toggle switch out the back and an unwired DB 25 pin socket on the base which was probably a joystick port in a previous life. However, the machine is working in all aspects, looks tidy enough and, unlike before, can be securely screwed together.
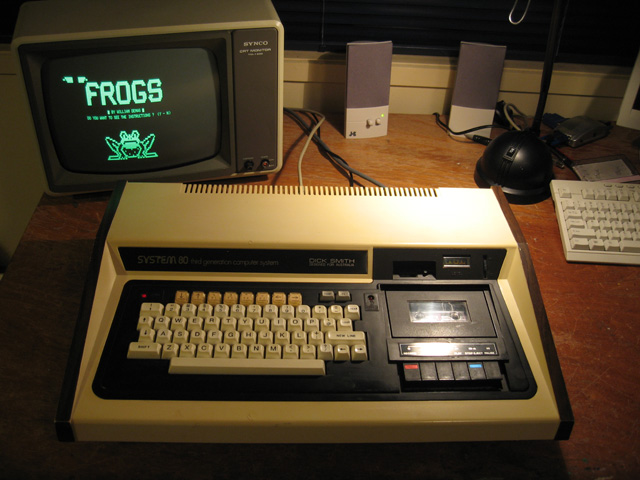
Figure 8. Fully working System 80 in replacement case.
The machine seemed to work just fine and now looked ok also. I decided see if anyone would be interested in buying it. During that process though, an old problem came back to bite me. You can read about that in part four...
Tez
7th July, 2010
Updated: 29th July, 2010
| Tweet |