Restoring a Commodore Executive SX-64
This is a retrospective entry which deals with a project I undertook after Xmas of 2007. Since I now have webspace to document these things I felt I ought to do so before it fades from the memory entirely.
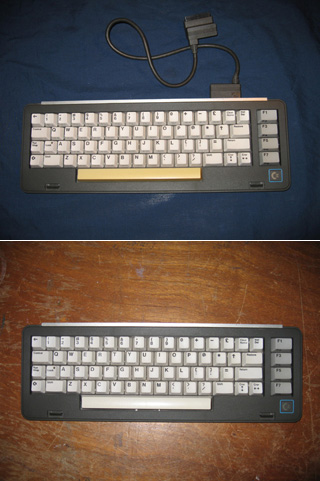
Despite it's yellowed space-bar, The Commodore SX-64 is one of my treasured models. When I first took delivery of it though, it wasn't the working unit now on display. The computer had been tucked away on a damp room and like a lot of vintage gear, it hadn't been fired up for years.
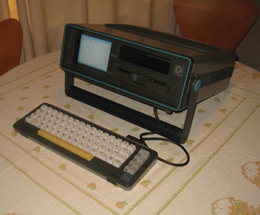 Figure
1. SX-64 newly delivered
Figure
1. SX-64 newly delivered
I was expecting trouble, either a large bang with smoke or at the very best, garbled characters on the screen. After warning children and locking up pets, I stood well clear and flicked the switch....
This photo opposite shows what happened. Nothing dramatic (whew!).
Words even appeared on the screen! Things were looking good! However, a closer examination of these words was less encouraging. Instead of the usual READY with the friendly flashing cursor, I saw, “Out of memory. Error in line 0”.
A clear indication of IC failure. Oh well, disappointing but not unexpected.
Faulty RAM
One thing good about Commodore computers is that they were very popular. Because of this, a lot of info. is out there on the Net as to how they work and some of the common problems. Trawling around with Google showed the problem was likely be a faulty RAM chip. Having confidence that this was indeed the issue, I figured I needed to do two things...
- Get some new chips and..
- Work out how to replace them
Through the Vintage Computer Forums, I'd made contacts with people who sold these vintage ICS. Not knowing if it was more than just one chip, I ordered a set of eight SX-64 RAM chips from the U.S. I also ordered sockets, as I didn't want to have to desolder chips if one failed in the future. Eventually these chips arrived and it was time to open up the computer and see what I could do.
My Internet searching had not only thrown up a diagnosis, but also a step-by-step guide for repairing an SX-64. This was written and made available by Ray Carlsen, a repairman/enthusiast who has a number of Commodore repair guides on the Internet.
A year ago I wouldn't have even considered doing this, but having replaced ICS in my Osborne 1 and C-64, I was flushed with confidence that these repairs are not that difficult providing you have good information and take things carefully.
Following the guide I opened up the clam-shell case and got to work. There is not much room in these portables, and the cards were packed in tightly. I identified the card containing the RAM. The next question was which chip was faulty? There is a technique of identifying bad chips by piggy-backing a known good chip over a suspected bad one (just held by friction), to see if that solves the problem. However, I didn't have the room to do this.
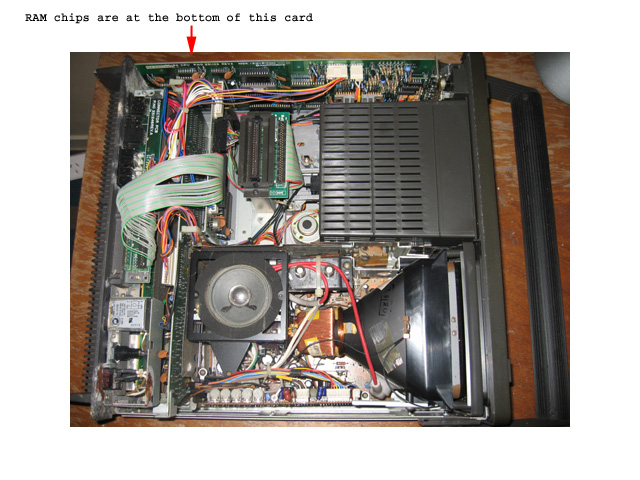
Figure 2. The naked SX-64
With the top shell off the SX-64, and the unit switched on, I tried to feel which RAM chips might be getting hot. Things are packed so tightly in there though, I could only feel the top 4. They felt fine. While not all bad RAM chips get hot, I figured I would start with those ICs lying at the bottom of the board where I could not reach to check. I suspected one of those might be the faulty one.
I switched off, removed the CPU board and started the chip replacement on the lower 4 chips hoping it would be one of these. To get to the RAM card required removal of many of the cables. As suggested in Ray's guide, I took pictures before I removed or unplugged anything so if I forgot where things should go on assembly, at least I had a reference.
Replacing (and socketing) the first two ICs didn't make any difference, However when I started cutting the pins on the third chip it disintegrated! A chip made brittle by overheating would do this I deduced, so this got my hopes up. After socketing I flicked the power switch on and....... there was the familiar boot up screen. 38K or so of RAM available. HOORAY!
However I didn't get TOO excited....This machine hadn't been on for about 20 years so I was expecting other problems. Would it load programs and run them successfully?
First thing I did was clean the drive. Then I put a disk with game "Commando" on it, and loaded. After the interminable wait familiar to all with a Commodore drive (Zzzzzzz...) , the program appeared to load successfully. So far so good. Typing "RUN" (with my heart in my mouth) bought up the Commando splash screen. It worked!!
But wait...no sound? Hmm...A dud SID chip wouldn't have surprised me. But..hang on...maybe there is a volume control somewhere? Flipping open the little panel on the right revealed a few nobs and one of them said volume. Turning this clockwise...revealed the manic music associated with this game! Whew!
Removing corrosion
There was one other issue I dealt with before I deemed the computer fully restored. There was some corrosion around the power transformer, both rust and other crystalline substances for oxidation reactions (Figure 3)
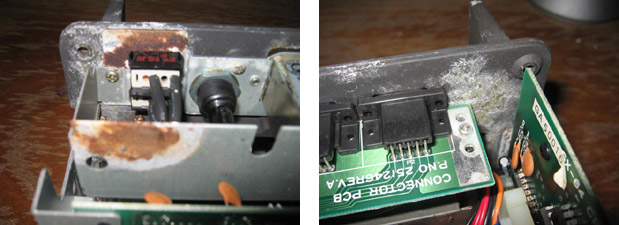
Figure 3. Rusty bits at the rear of the SX-64
I removed this and sprayed the insides with contact cleaner to prevent any more damage. It now looks in much better shape.
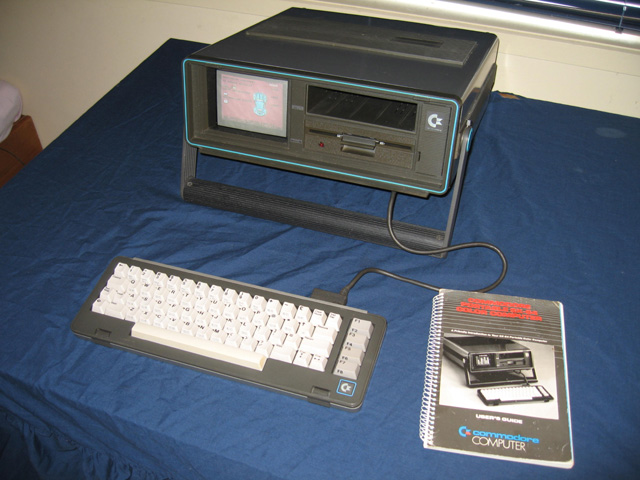
Figure 4. The repaired and refurbished SX-64
So there it is. Another repair and more experienced gained in fixing these old classics.
Tez
18th October, 2008
Footnote (8th March, 2009) : You would have noticed the space bar was very yellowed in the first photo. I managed to removed the yellowing using the de-yellowing recipe experimented with over the 2008-2009 New Zealand summer.
| Tweet |