Adventures with an 8 inch (8”) disk drive:
Part 2. Preparation and testing
<-- Back to Part 1 - New acquisition: A Mitsubishi M2896-63
This is the second episode in a series of blog narratives, detailing recent fun with a newly gifted 8’ floppy disk drive. This page covers the challenges of preparing the drive and testing its readiness for disk imaging and file extraction.
Introduction
In the last post, I wrote about acquiring an 8” disk drive for both imaging my own 8” disks and expanding my capability for floppy disk file extraction. Now it was here, the next task was to connect it up to a machine that could use it!
The best machines for these jobs are PC-type floppy disk-capable boxes with at least an intel 386 CPU. However, suitability also depends on the versatility of the floppy disk controller. Many 8” disks are written in single density. Only SOME of the disk controllers in PC-type machines will handle this mode. My usual Windows 98/MS-DOS computer could not. However, I had two other untested working units available that could potentially do the job. One was a collection piece, my 386-DX. The other was the one below (Figure 1), which I happen to check out first. As luck would have it, standard test software (Dave Dunfield’s TESTFDC.COM) told me this one could read and write single density disks!
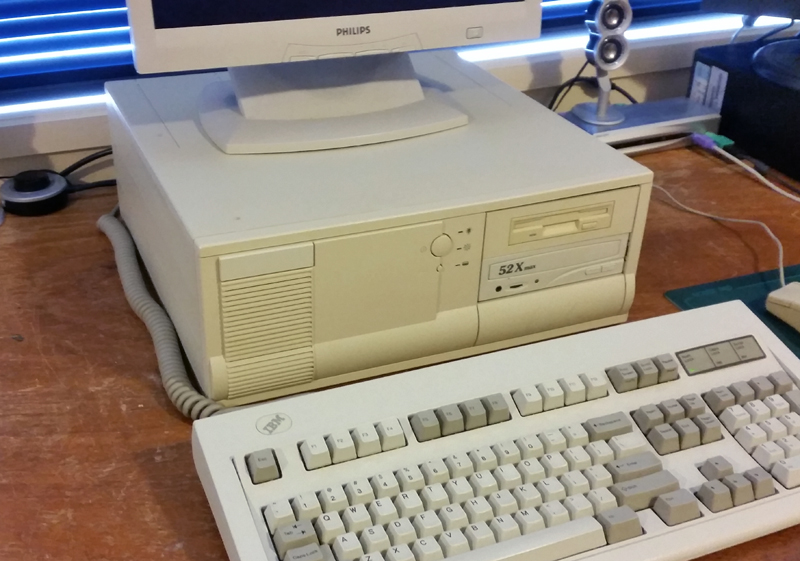
Figure 1. My 120 Mhz Pentium 1. Perfect for the job!
This computer isn't an official part of the collection, but I keep it because it is a fast sound blaster-compatible “vanilla clone’, and very good for MS-DOS games (I've got DOOM installed on it, which I occasionally play). It is a square box so it's easy to store/stack. The lid is held by two clips and one screw so access to the innards is easy. There is no USB connector and it isn't networked, but it DOES have a 3.5-inch floppy disk drive through which files can “escape” from the system and be loaded elsewhere.
On thing I should mentioned here. I'd Googled a lot but before diving in but I felt it wise to get some advice. What better place to get it than the Classic Computers mailing list (@classiccmp.org) and the Vintage Computer Forums...not just on physical connection issues but also on 8” disk imaging and file extraction generally. These guys were very helpful. It was knowledge I used from this point on. Surely this stuff would be impossible without these and similar Internet communities!
Connecting the drive up
There are two points of difference between an 8” drive and the 5.25” and/or 3.5” drives which this host computer was designed to house. One is the card edge connection. The 8” drive uses 50 pins, the 5.25” uses 34. Also, the power requirements are different. The 8” drive needs 25v from somewhere. The masochist in me says I should have built my own cable and PSU but, preferring not to make things harder than they need to be, I bought a FDADAP disk controller to 8 “ drive interface and FDDC DC-DC power adaptor from D Bit in the U.S.A..
While waiting for the gear to arrive I prepared the computer. This involved digging out one of my spare drive cables, adding a spare male connector, plugging it into the B drive connector and snaking the cable out the back of the machine (Figure 2).
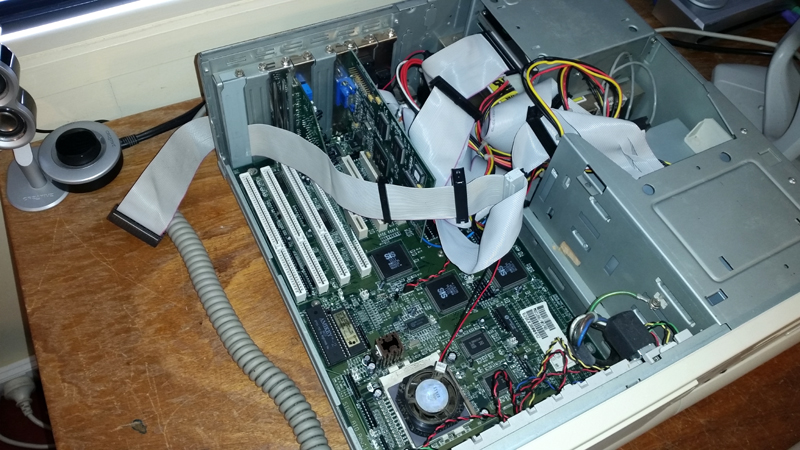
Figure 2. Extending the drive B connector to outside the computer
Once the gear from D Bit arrived from the U.S., I connected everything up making sure the cable was around the right way on the 8" card edge (despite making the drive to interface cable up with the red line on the wrong side..duh!) (Figures 3 and 4). A spare PC PSU supplied the power to the drive, and the two interface cards (Figure 5). Using the manual dip switches on the drive were checked to make sure they read both sides of what the computer regarded as the second drive. I did have to change a couple of these switches.
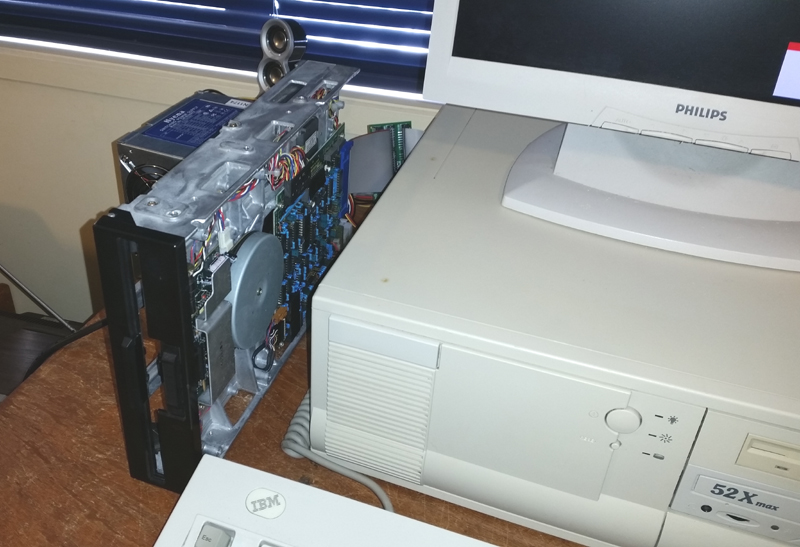
Figure 3. All wired up and ready to go!

Figure 4. It's not pretty back there but looks aren't everything!
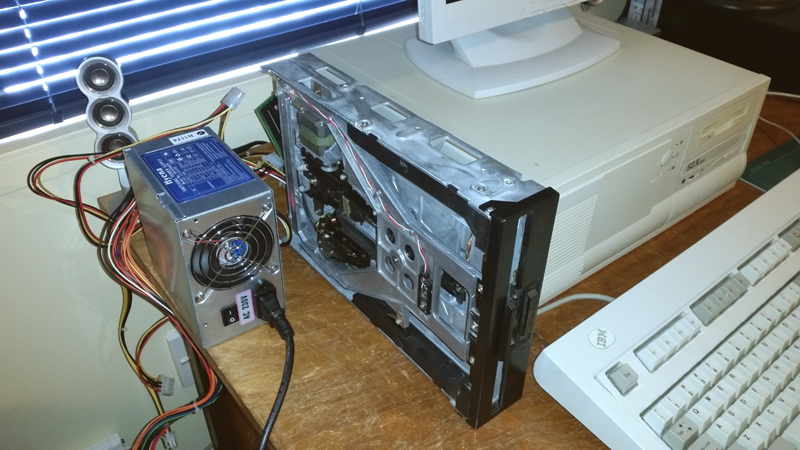
Figure 5. This ATX PC PSU has connectors to spare but it does the job!
Having configured the drive in the computer's CMOS as a 5.25 inch 1.2MB floppy, I readied myself for the big switch on.
Testing the drive
Power was applied to the drive, then the PC. Memory was checked, the A drive light flashed, then the 8” drive sprung to life for a second. That was a good sign but more was needed before I let loose on imaging disks. I need to be convinced that the hardware was working, so that any imaging or file extraction problems down the track wouldn't be muddied by hardware problems.
To test the drive I decided to first format a disk in it using good old MS-DOS 6.22 and do some basic file manipulations (copy, delete, type etc.) to see it behaved like a normal drive. First indications were promising (Figure 6)!
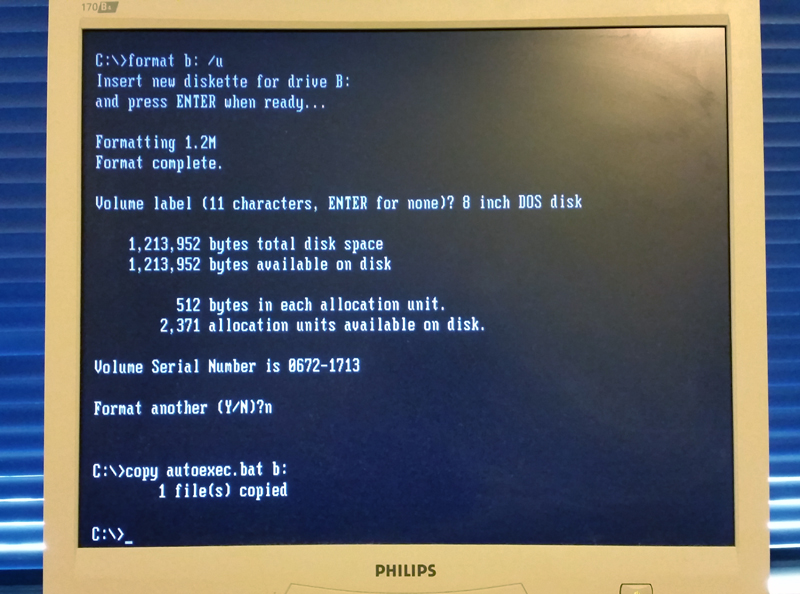
Figure 6. A successful format and file copy
I spent more time copying, deleting, listing and looking at the directory. Eventually I was satisfied everything was working just fine.
Next...
I now had a computer with a working 8" floppy. That was the hardware taken care of. Time to get that data off those disks!
--> Click here for Part 3. Imaging and extracting files from my own 8” floppies...
Tez
15th April, 2017