Adventures with an 8 inch (8”) disk drive:
Part 3. Imaging and extracting files from my own Panasonic JD-850M and Poly 1 8” floppies
<-- Back to Part 2 - Preparation and testing
This is the third episode in a series of blog narratives, detailing recent fun with a newly gifted 8’ floppy disk drive. This one covers imaging my own 8” floppy disks.
Introduction
Now I had confidence that the drive was ok, it was time to try imaging and extracting files from my own 8” disks. I had two sets. One set contained mostly business software for the Panasonic JD-850M, the other held educational programs for a New Zealand Polycorp Poly 1.
Imaging the Panasonic JD-850M disks
For this task I used Dave Dunfield’s excellent ImageDisk program. I’d used this software previously for imaging 5.25” disks so the learning curve wasn’t high. I just had to remember to configure the track number to 77 rather than the usual 40 or 80. Anyway, it worked like a treat.
As a bonus the software also provided some information on the format used. These were double-sided, double-density disks, 26 sectors per track and 256 bytes per sector. However, there was something unusual. In the majority of the disks that first track (and only the first track) was single-density, 128 bytes per sector? Weird. However, I had read about formatting of this nature used in other systems. For example the TRS-80 Model II TRSDOS OS has a single density boot track, but the rest of the tracks are double-density.

Figure 1. Imaging JD-850M disks like a boss with Dave Dunfield's ImageDisk software
(Click here to watch an MP4 video of the process)
After a while I had images of all 47 Panasonic disks. Some sectors were unreadable on quite a few of them. These disks had been stored in a damp garage for decades. A number had fungal growth on the media which I had to wash it off prior to use. Consequently, I wasn't expecting 100% recovery of the data. However, the imaging process showed me which disks had damaged sectors. This was useful as I could mark the disk as unreliable, and in need of re-formatting and testing. In the end I found about a third of the disks had at least one unrecoverable sector. That didn’t matter though, because they were all essentially copies of just five master disks, so I easily got at least one complete image for each.
JD-850M disk file extraction
Disk images are great when you want to recreate a floppy. However, without third party software, they don’t let you see or extract whatever files might be on them. I wanted to extract the files from my five MASTER disks, as they had unique inventory software written in BASIC specifically for this machine. I wanted to preserve this code, and possibly try it in other CP/M machines.
For this, 22DSK (which can be found on this page) was the answer. This software interrogates a CP/M disk, and lets the user carry out basic management functions. However, unlike MS-DOS, CP/M is not standard when it comes to disk formats. Before 22DSK can be used on a CP/M disk, the user has to choose the specific disk format being interrogated from a list of hundreds of models so the software knows how exactly how the tracks and sectors are arranged.
Unfortunately, there was no definition for a Panasonic JD-850M.
All was not lost though. The documentation with 22DSK does have a section on how to figure out all the parameters needed to build a definition. However, before I attempted this, I needed to be sure I'd mastered the calculations. As a learning exercise therefore, I experimented on a disk with a known CP/M format (I selected Amstrad CP/M on a 3.5 inch disk), and tried to calculate its parameters from scratch. As I progressed through the calculations, I could check the figures with the definition file to see if I was right. I used ANADISK (found on the same page linked above) to help me with this. This program allowed me to select specific sectors (Figure 2) and see the bytes within.
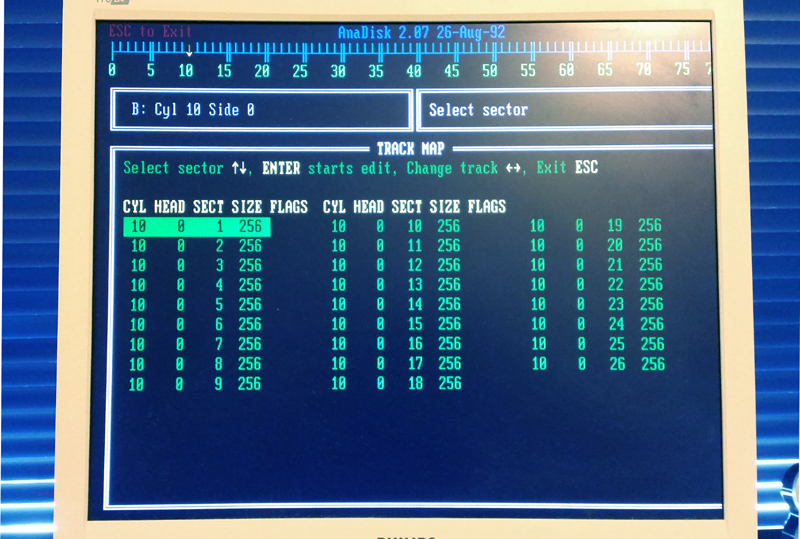
Figure 2. Getting ready to select a sector in Anadisk
Try as I might, I could never quite get all my calculations to come to the exact same number(s) in the definition file. I must have been missing something, so wasn’t confident about building a definition for the JD-850M . Fortunately, the creator of 22DSK, Chuck Guzis, is an active member of both classiccpm.org and VCF, and a very helpful guy, He supports registered users of the software. I sent him a JD-850M disk image and very soon he provided me with a definition. Using that I could see all the files, and extract them from my Master disks (Figure 3).
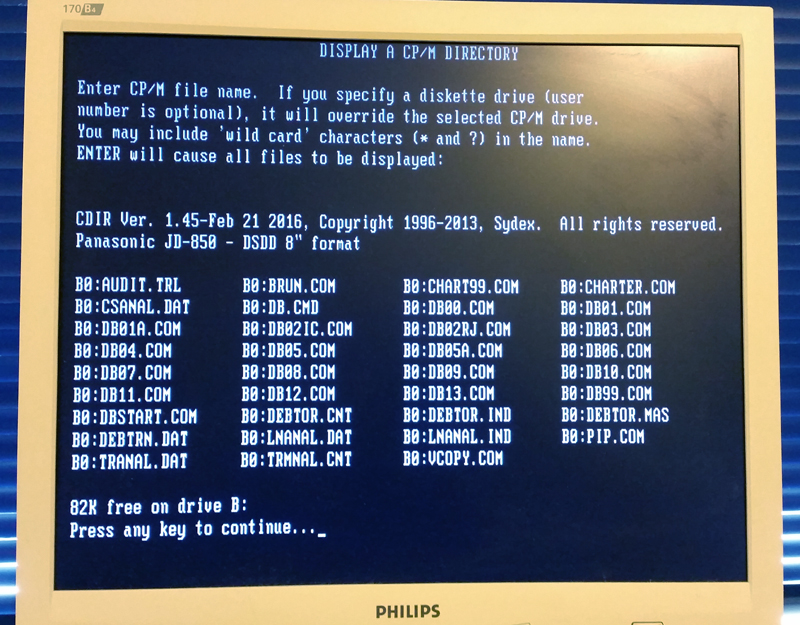
Figure 3. A directory listing of a Panasonic JD-850M 8" disk using 22DSK
So, more CP/M software saved from extinction, although globally the number of people ever wanting to study inventory software for a Panasonic JD-850M is probably zero. Never mind, it makes me feel good anyway. I feel like I’m saving an extinct species! I’ll make the software available in a later blog and probably also send it to archive.org.
Imaging the Poly 1 software
A few months ago I’d sent my Poly 1 8” disks down to Andrew Trotman in Dunedin, New Zealand to image, archive and make them available on his Poly 1 support website. Hence they were already preserved forever before I started this exercise, but they were only in a DSK format suitable for Andrew's emulator. I wanted them in IMD format so I could create new disks if I needed to. The IMD software handled these with aplomp and soon I had all my Poly 1 disks imaged and safely tucked away in the archives just in case one of my real disks failed (Figure 4)!
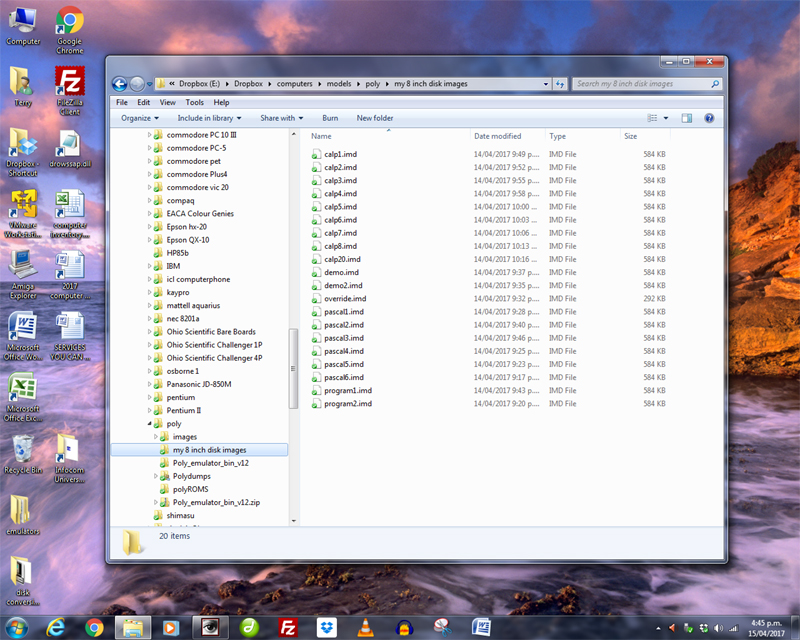
Figure 4. IMD images safely tucked away in my archives
Concluding thoughts
It was good to get the rare software from my two 8" disk computers archived. Also, I'm now in a position to extract data from more 8" disks if needs be. The whole project was a lot of fun and I've learnt a lot! A big thank you to everyone who helped with it.
Tez
15th April, 2017